
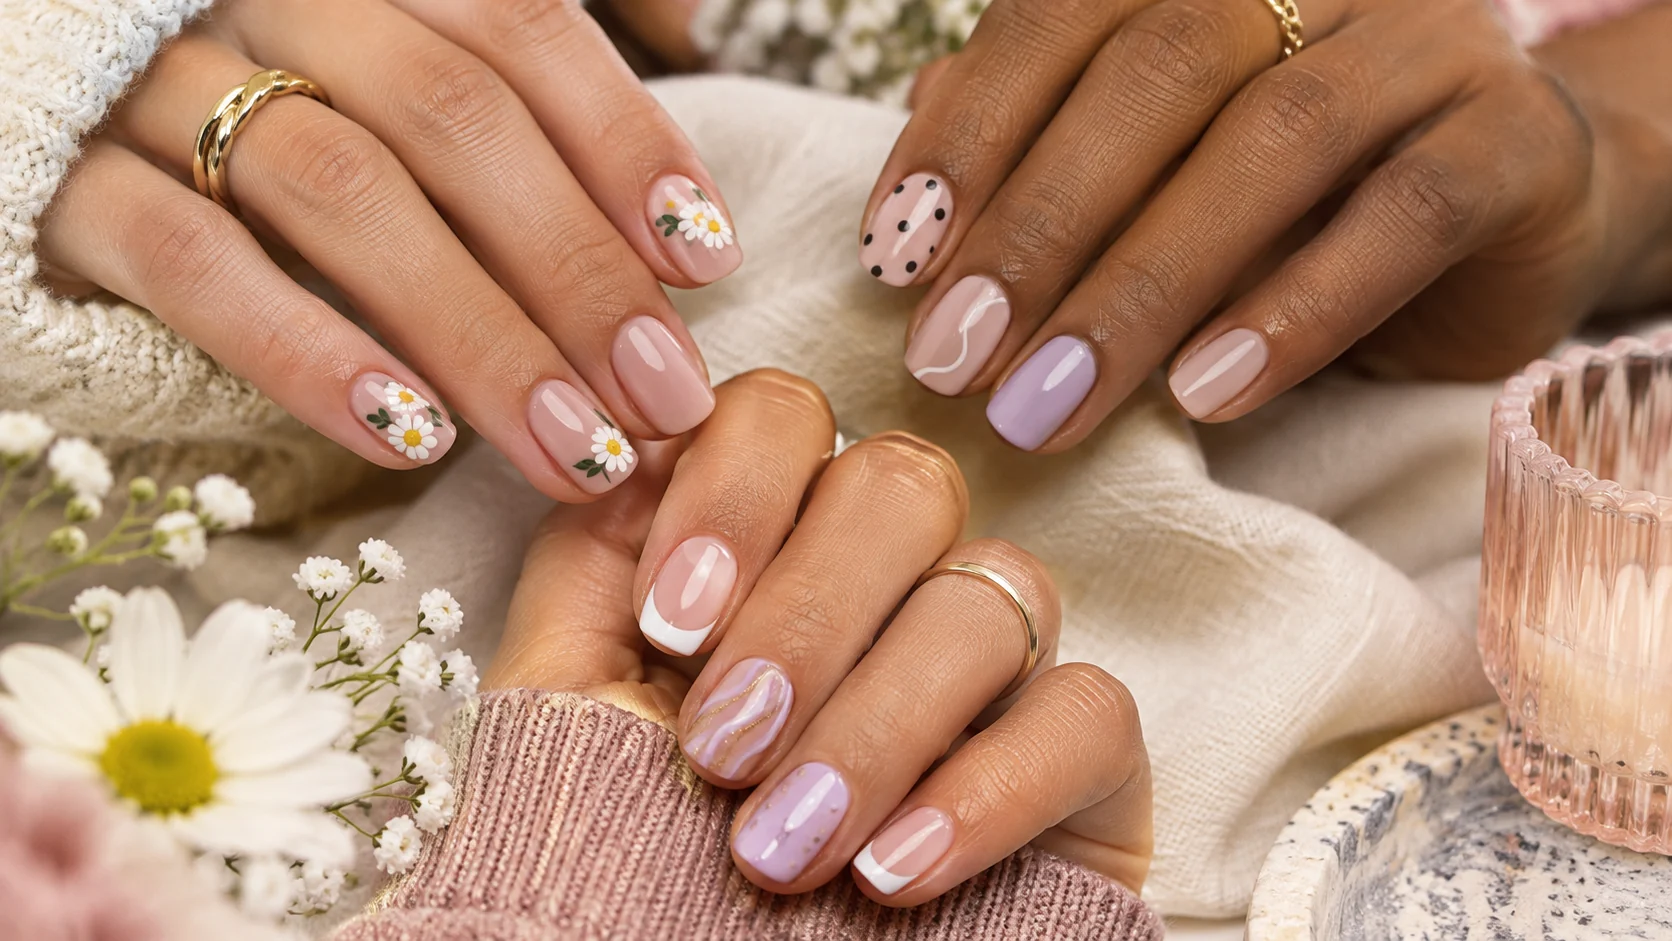
Simple nail art designs do not have to mean expensive salon appointments, long nails or a drawer full of professional tools. A dot, a thin line, a small flower or one carefully placed sticker can turn an ordinary manicure into something you actually want to show off.
Below are 12 easy nail art ideas with photos, supplies and straightforward steps. You will find delicate French tips, pastel hearts, tiny daisies, soft waves, glitter and a few more polished looks. Most can be recreated using regular nail polish, a toothpick or dotting tool, and a little patience. For the trickier patterns, I have included a sticker-friendly option.
Quick answer: If you are just starting, try a single heart sticker, a tiny daisy made from dots, or a simple glitter tip. Each uses only one small accent, so mistakes are easier to correct.
What You Need for Simple Nail Art Designs at Home
You do not need a large professional kit. Gather a few basics before choosing your favorite style:
- Base coat: To prepare your nails for color.
- Two or three nail polish colors: Nude or pink makes an easy background; white, black or pastel shades work well for details.
- Dotting tool or clean bobby pin: Useful for tiny dots, petals and hearts.
- Fine nail-art brush or nail pen: Ideal for curved lines and French tips.
- Stickers or decals: A great shortcut for hearts, leaves or marble patterns.
- Top coat: Helps smooth the design and protects the polish.
Before you start, wash and dry your hands and gently shape your nails. Work with thin coats of polish and let each layer dry enough that it will not smear when you add the next. If you prefer the simplest route, use a standard air-dry polish instead of learning gel products and curing lamps at the same time.
12 Simple Nail Art Designs for Beginners
Each photo shows the finished design. Read the short steps directly below it to recreate a similar look at home.
1. Classic White French Tips
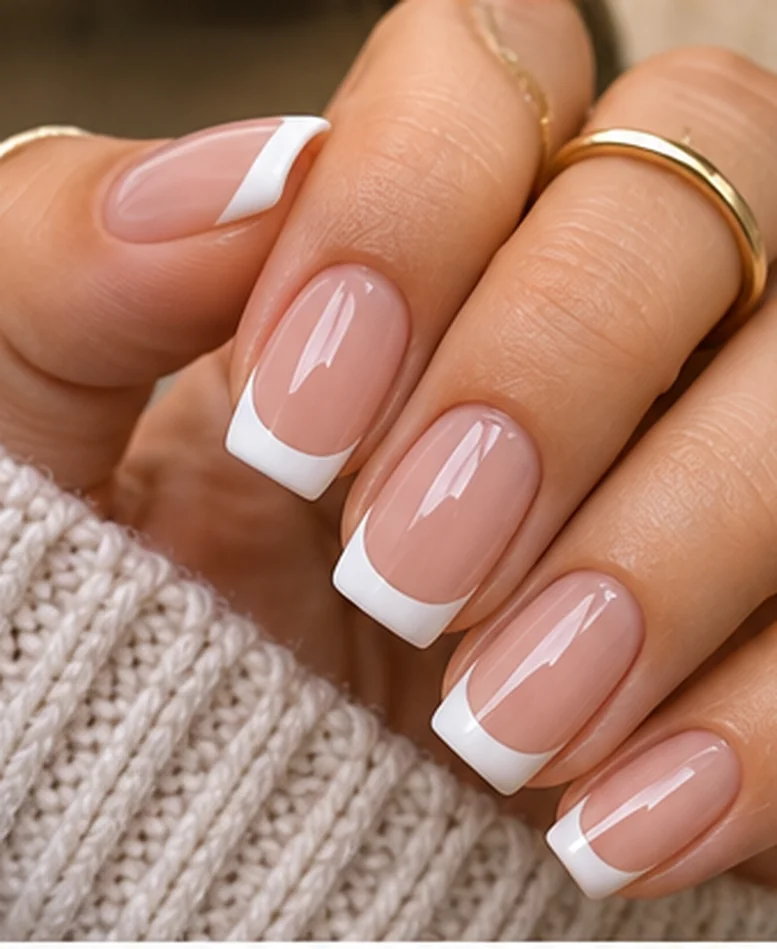
Clean nails that work with almost any outfit. A sheer pink base and neat white tips make this a timeless choice. The design works on short square nails or longer almond shapes. Keep the white edge as narrow or as bold as you like.
What you need: Sheer pink polish, white polish, French-tip guides or a fine brush.
- Apply a sheer pink or nude base color and allow it to dry fully.
- Use curved French-tip guides or a steady detail brush to paint the white edges.
- Remove the guides carefully, then finish with clear top coat.
Beginner tip: If freehand lines feel tricky, use guides. A slightly thicker tip is also easier than a very thin one.
2. Lavender Nails With One Heart
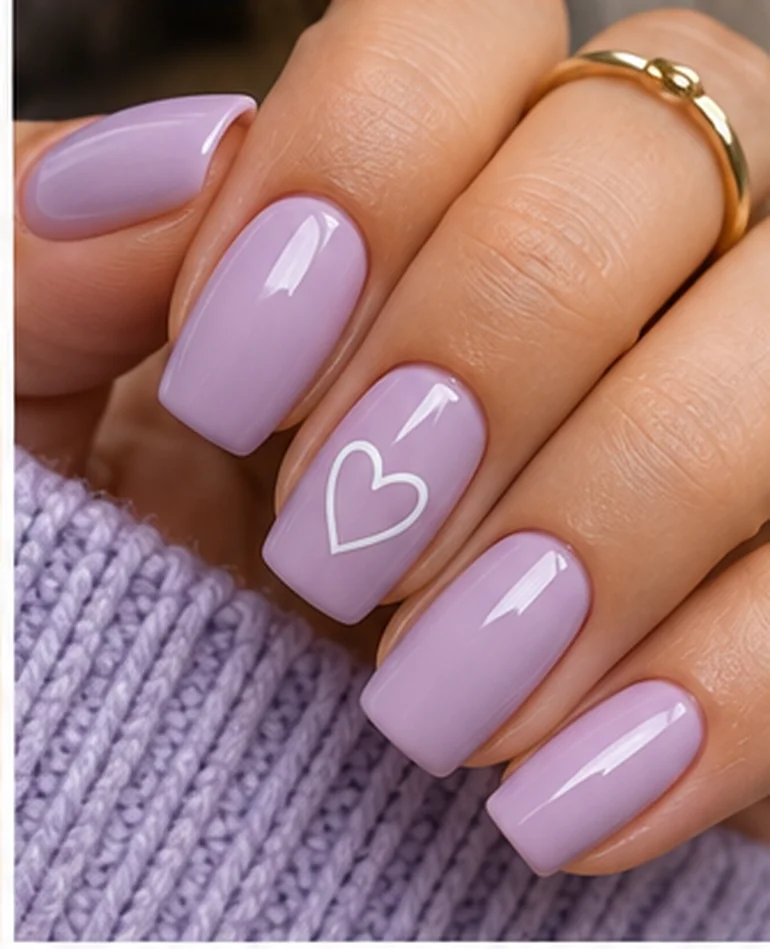
Soft pastel color with a sweet little detail. Lavender polish looks pretty on its own. One white outline heart on the ring finger adds a small, playful detail without making every nail busy. This style is ideal when you want easy nail art that still feels special.
What you need: Lavender polish, white nail-art pen or heart decal, top coat.
- Paint each nail with two thin coats of lavender polish.
- Once dry, add a small white outline heart to one accent nail using a detail brush or heart decal.
- Let the design set and seal it with a glossy top coat.
Beginner tip: Place the heart in the center of one nail for the neatest look.
3. Minimal Black Wavy Lines
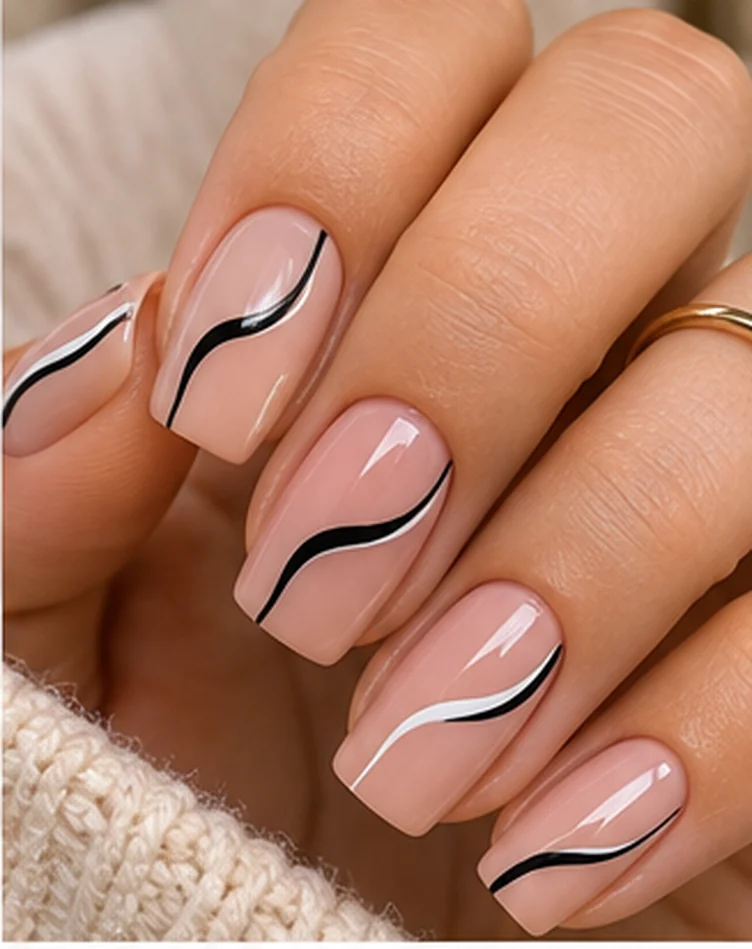
A modern look with only two colors. Black curved lines over a soft nude base look striking, even if the lines are not perfectly identical. In fact, the small variations are part of the charm. Try one wave on each nail, or combine a black wave with a thinner white line.
What you need: Nude polish, black nail-art pen or thin brush.
- Apply a beige or blush-nude base color and wait until dry.
- Using a striping brush or nail-art pen, draw one gently curved black line across each nail.
- Keep the lines light, allow them to dry and add top coat.
Beginner tip: Practice the curve on a piece of paper first, then use the same motion on the nail.
4. Delicate Gold Foil Accents
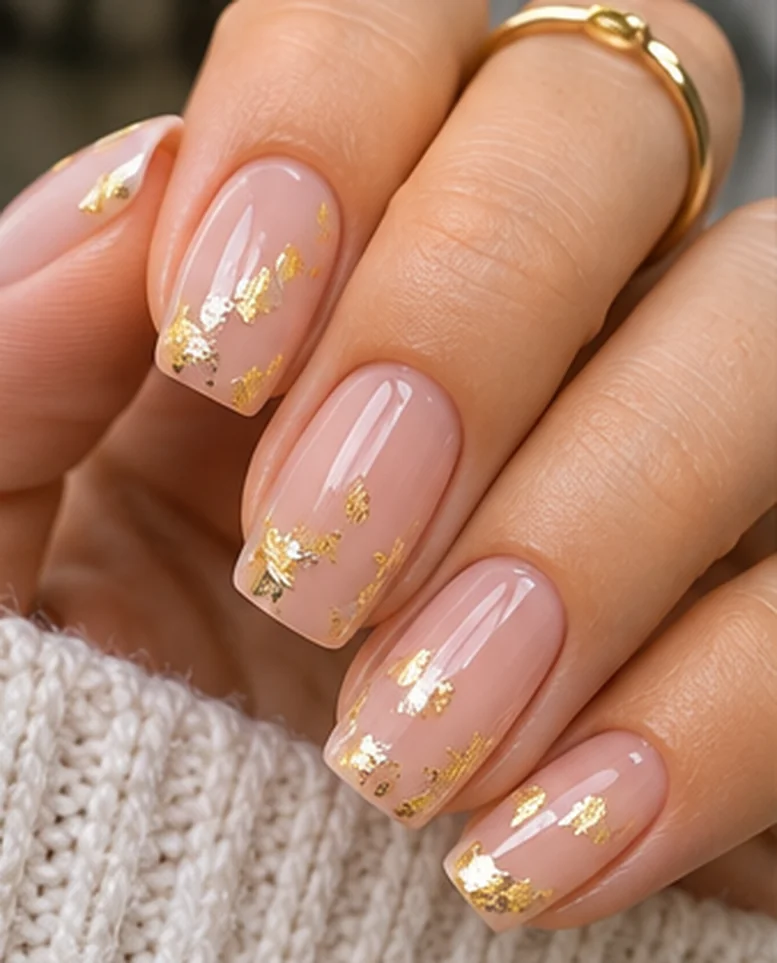
A little shine without a complicated pattern. Small flakes of gold foil make a simple neutral manicure feel dressed up. You do not need to cover every nail. A few scattered flakes on the tips or along one side look elegant and work well for celebrations.
What you need: Neutral polish, nail-art foil, tweezers, clear top coat.
- Paint a sheer peach or nude base and allow it to become slightly tacky or add a small amount of foil adhesive.
- Use tweezers to place tiny cosmetic nail foil flakes where you want the shine.
- Press gently into place and seal thoroughly with top coat.
Beginner tip: Less foil is usually easier to control. Keep flakes away from the cuticle and sidewalls.
5. Sage Green Leaf Accent
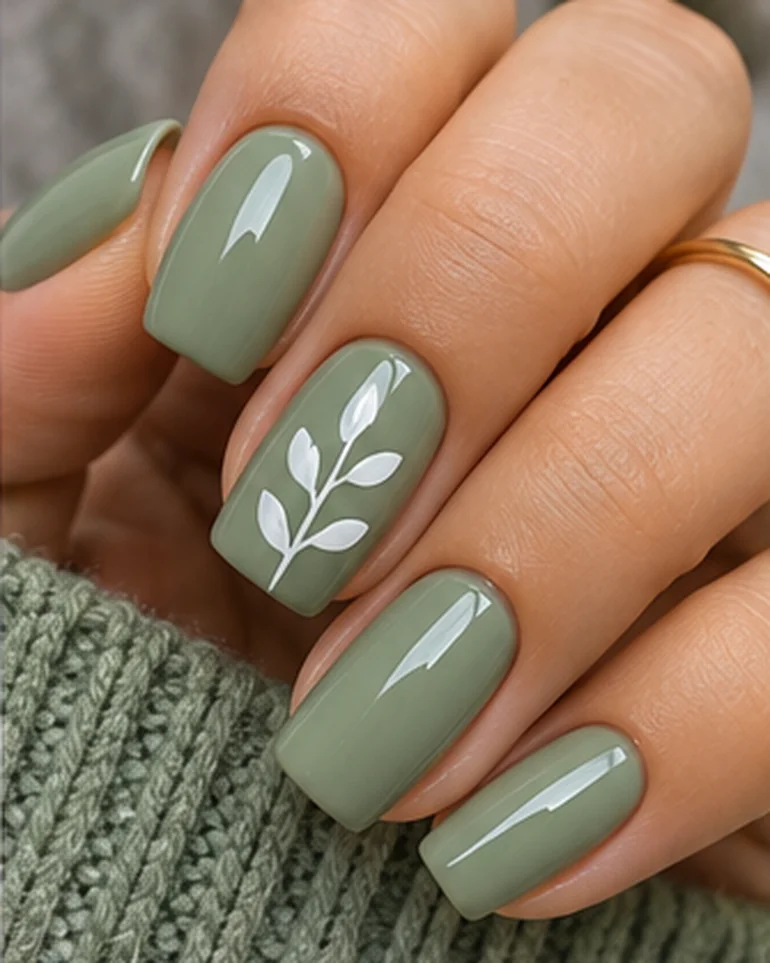
A subtle botanical manicure. Muted sage green pairs beautifully with one small white leaf motif. For beginners, a ready-made nail decal or sticker gives the cleanest result. If you enjoy painting, try a thin stem with three or four leaf shapes on one accent nail.
What you need: Sage green polish, botanical nail decal or fine brush and white polish.
- Paint all nails with a muted sage green polish.
- Add one small white leaf decal to your ring finger, or paint a thin stem and tiny leaves with a detail brush.
- Press down any decal edges and seal with top coat.
Beginner tip: Do just one decorated nail. Keeping the others solid makes the design look balanced.
6. Tiny Black Hearts on Blush Pink
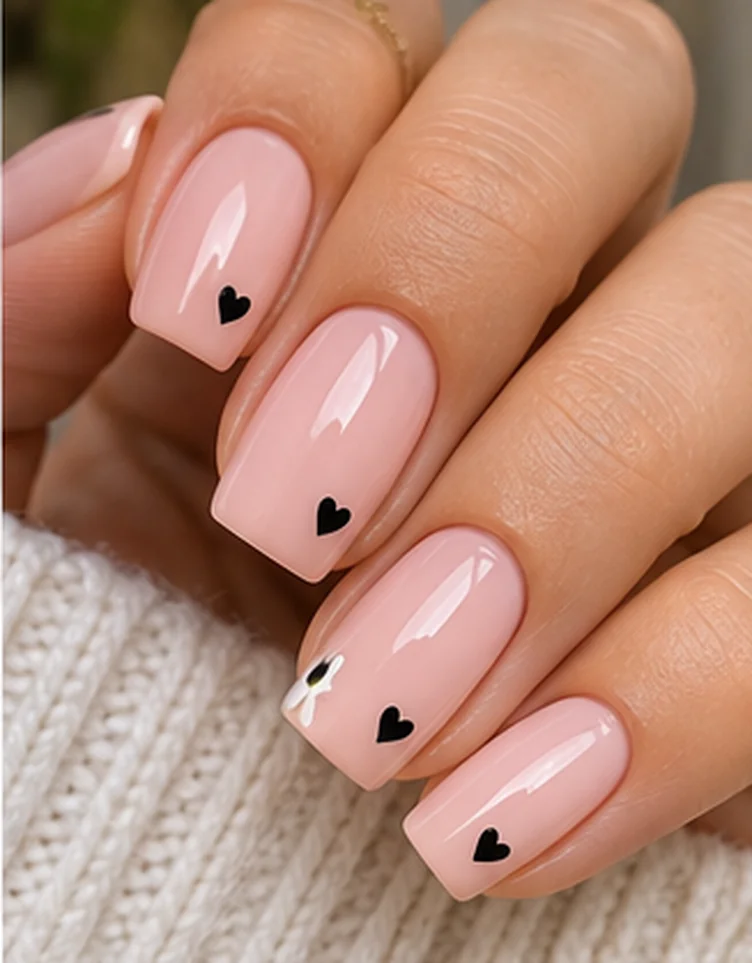
Small details that take very little space. A single tiny black heart near the edge of each blush-pink nail is playful but still minimal. This works especially well for short nails because you do not need much room to fit the pattern.
What you need: Blush polish, black polish, dotting tool or micro-heart decals.
- Apply a pale blush or milky pink polish and let it dry.
- Use two tiny black dots close together, then pull them down into a point with a toothpick. Alternatively, use micro-heart stickers.
- Seal the design once the hearts are completely dry.
Beginner tip: Start with a heart on just one nail if you are new to small details.
7. French Tips With an Outline Heart
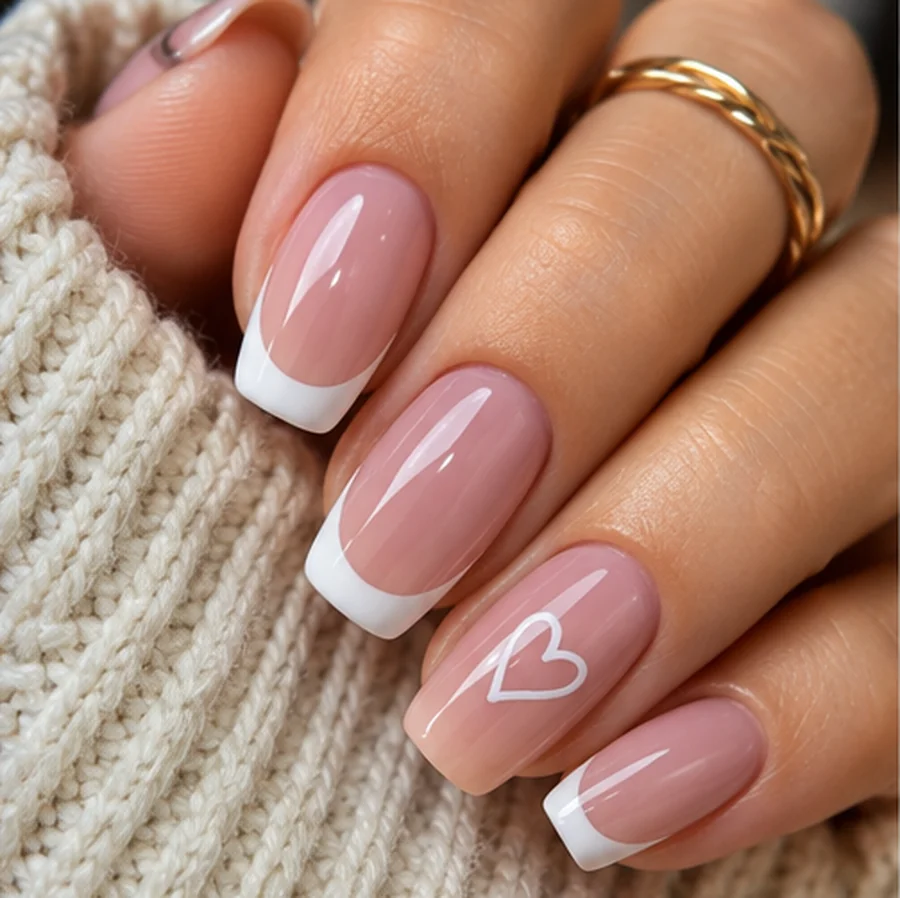
A classic manicure with one romantic accent. This idea combines white French tips with a single fine heart outline on an accent nail. It looks more detailed than a basic French manicure, but nail guides and a heart sticker make it very manageable at home.
What you need: Pink and white polish, French-tip guides, outline-heart sticker or nail pen.
- Create a sheer pink manicure and add white French tips on most nails.
- Leave the ring finger plain pink and place a white outline heart in the middle.
- Apply a glossy top coat after the edges and decal are secure.
Beginner tip: The heart does not have to be exactly centered. A small off-center detail looks intentional too.
8. Tiny White Daisy Flowers
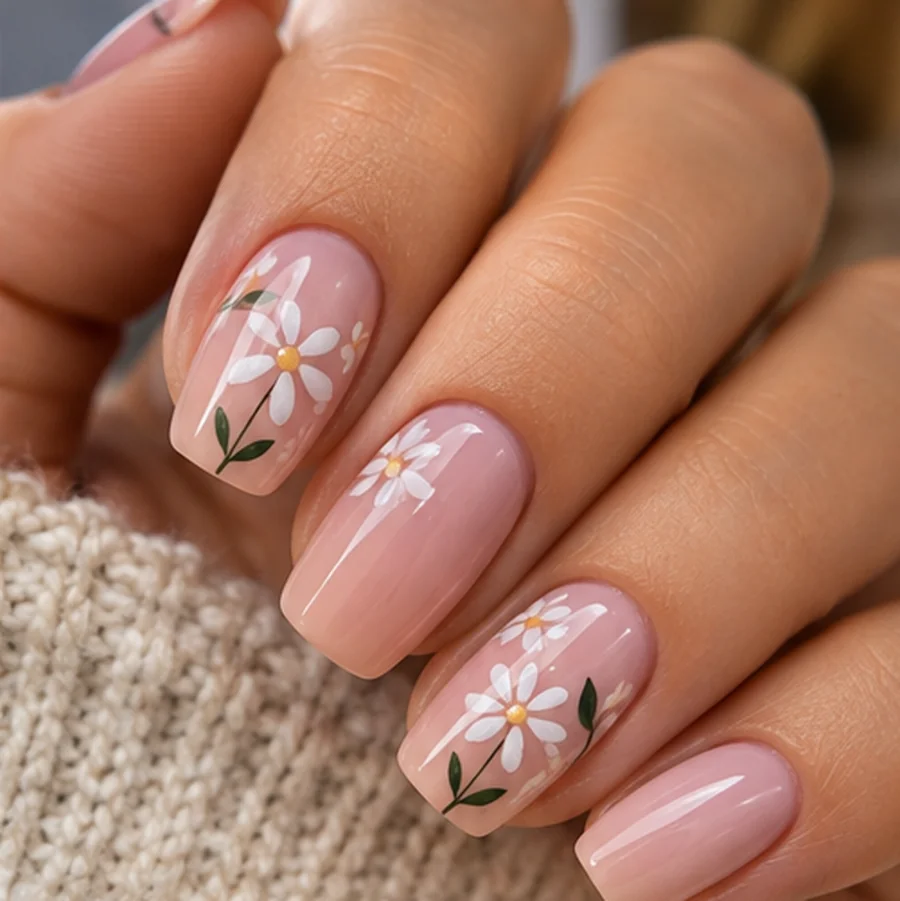
Easy floral nail art with a dotting tool. Daisies are one of the prettiest beginner-friendly nail designs. The petals are simply small dots surrounding a yellow center. Try one daisy per nail for a quiet look, or add a few blooms to a single accent nail.
What you need: Pink, white and yellow polish; a small dotting tool or bobby pin.
- Apply a nude-pink polish and allow it to dry.
- Make five tiny white dots in a circle using a small dotting tool, then place a yellow dot in the middle.
- If you like, add one tiny green leaf. Finish with top coat when dry.
Beginner tip: For short nails, use one tiny flower on the edge rather than several large ones.
9. Soft White Wavy Lines
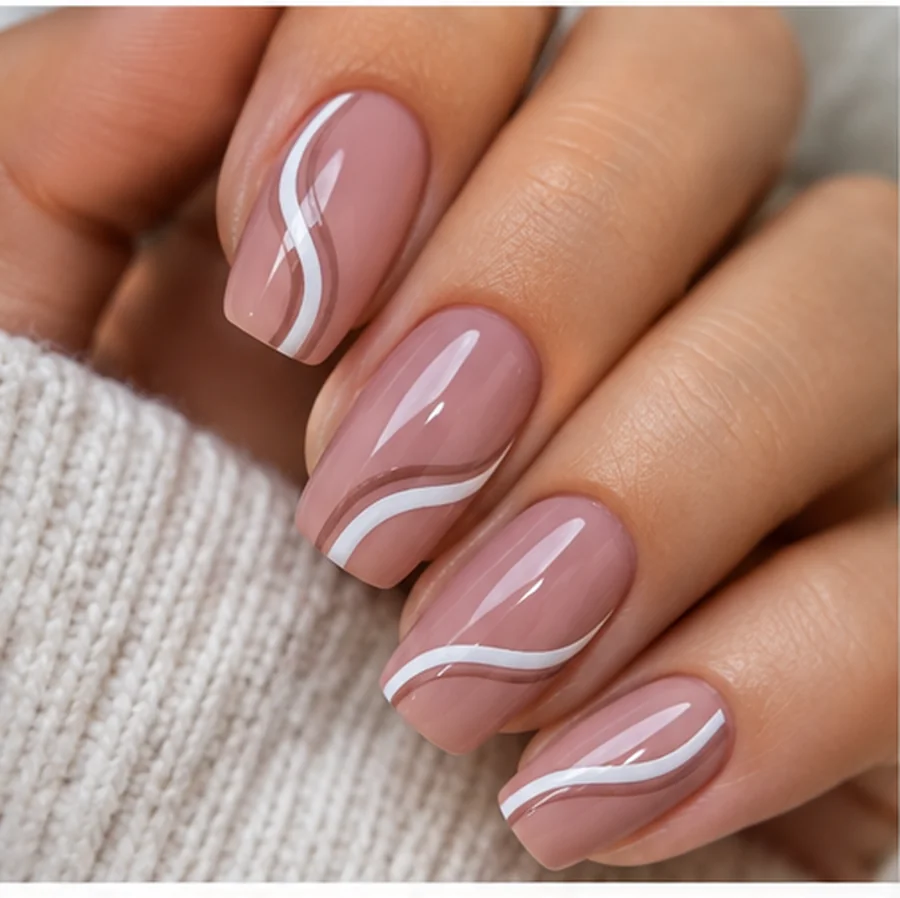
A gentle take on abstract nail art. White waves over rose-nude nails feel soft and modern. The lines do not need to match from finger to finger. You can make one flowing curve on each nail or add a fine second line for extra contrast.
What you need: Rose-nude polish, white nail-art pen, thin brush.
- Paint your nails with a rose-nude shade.
- Draw one soft white curve across each nail with a thin nail-art brush or pen.
- Wait until the white polish is completely dry, then apply a protective top coat.
Beginner tip: Work from one edge to the other in a single slow motion to avoid jagged lines.
10. Black and Pink Heart Nails
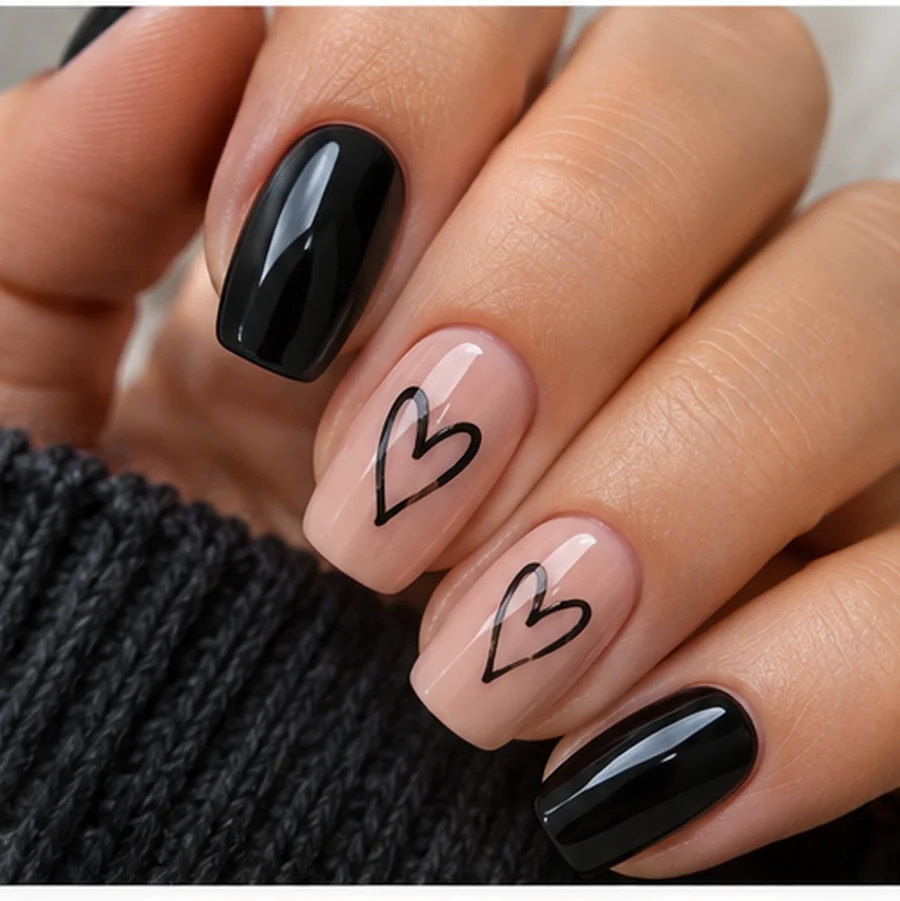
A bolder two-color manicure. If you like high contrast, combine solid glossy black nails with soft pink nails featuring black outline hearts. The result is more dramatic than the tiny-heart look but stays easy if you use decals or a simple nail-art pen.
What you need: Black polish, blush pink polish, black nail pen or heart decals.
- Paint two nails black and the others light pink.
- Add a larger black outline heart on one or two pink nails using a nail pen or sticker.
- Clean up the edges with a small brush and finish with clear top coat.
Beginner tip: Keep the hearts on no more than two nails if you want the black-and-pink contrast to stand out.
11. Sparkly Glitter Gradient Tips
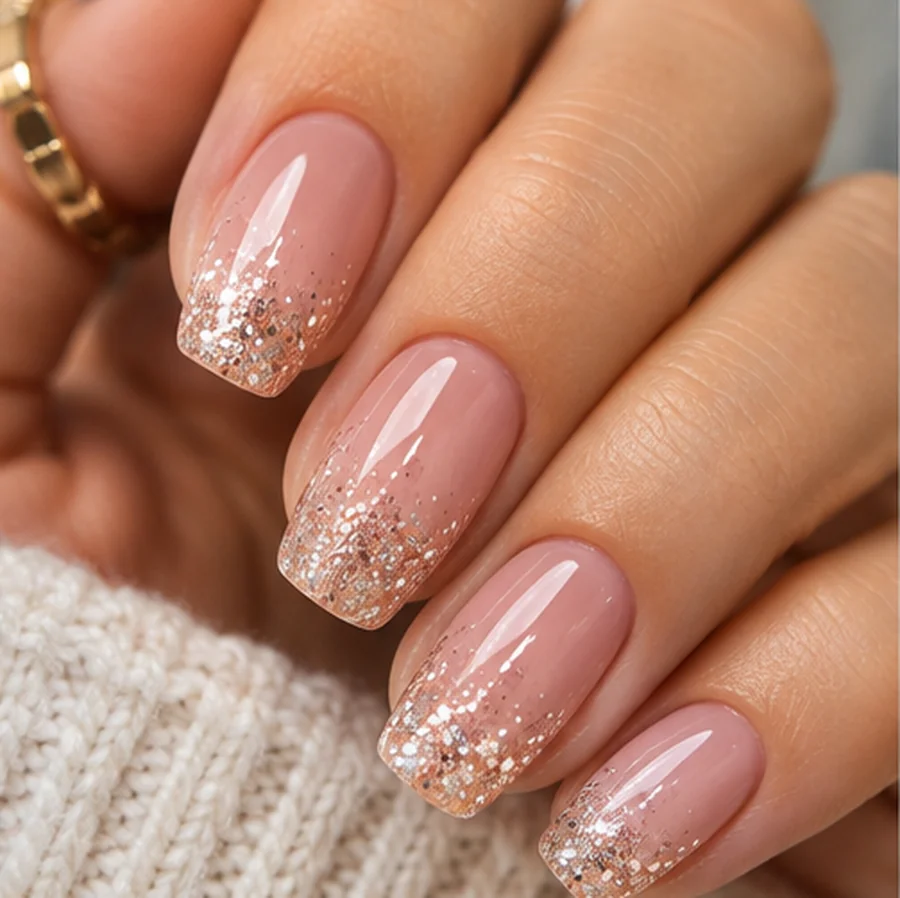
Subtle sparkle for a party or special occasion. A dusting of fine glitter at the tips creates a soft gradient without detailed painting. The trick is to use very little product and build the sparkle gradually, so the base still shows through.
What you need: Sheer pink polish, fine glitter nail polish, small sponge (optional).
- Apply a sheer blush base and allow it to dry.
- Dab a little fine glitter polish onto the tip using the polish brush or a small makeup sponge.
- Add a second light dab at the very edge, then smooth with glossy top coat.
Beginner tip: Use a makeup sponge for a softer fade, and protect your work surface from glitter.
12. Easy Marble Nails With Gold Decals
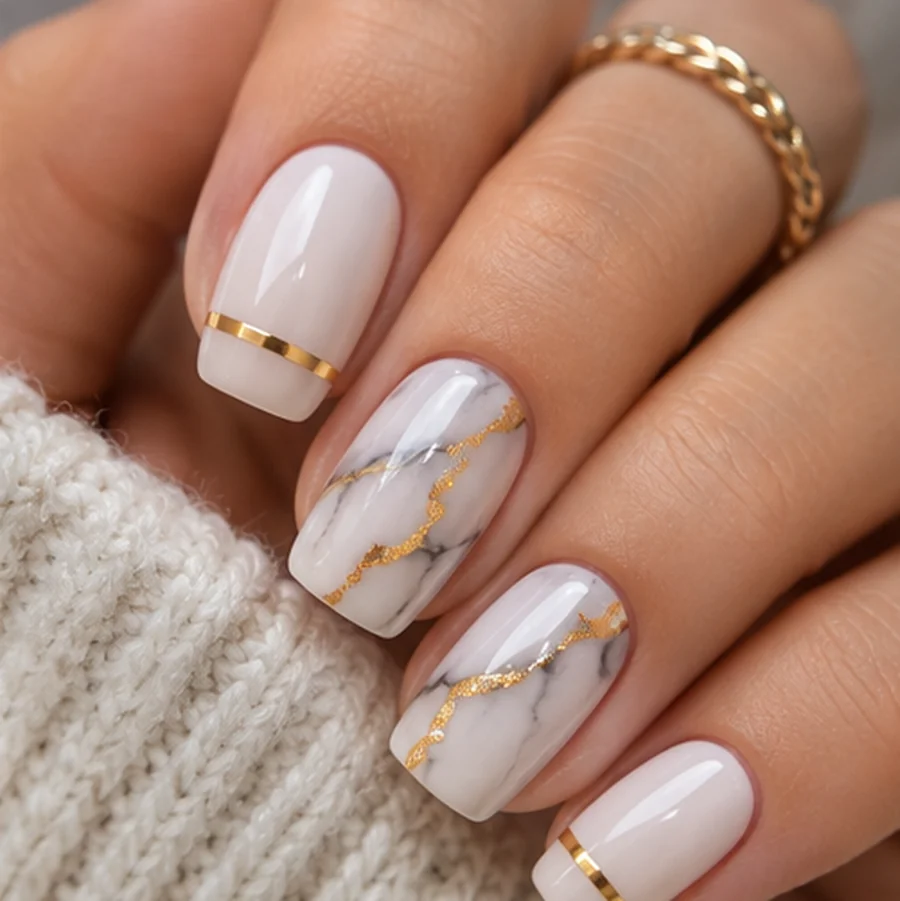
An elegant look without hand-painting marble. White marble with thin gold accents looks intricate. For a beginner version, use pre-made marble nail stickers or water decals instead of trying to paint the stone pattern freehand. Pair two marble accent nails with plain creamy white polish.
What you need: Creamy white polish, marble decals, optional gold striping stickers.
- Paint nails with an opaque milky white base and let it dry.
- Apply marble-effect nail decals to one or two nails. Trim them to fit and smooth out any bubbles.
- Add narrow gold nail-art striping stickers if desired, then seal the whole manicure with top coat.
Beginner tip: Choose thin decals that sit flat. Use a top coat compatible with the stickers to prevent lifting.
How to Make Simple Nail Art Look Neat
A clean finish matters more than complicated detail. Whether you choose pastel nail art or a bold heart design, a few small habits make a visible difference.
- Do one accent nail first. You can always add more details once you like the result.
- Use thin polish layers. Thick coats stay soft longer and can make nail art drag.
- Keep a tiny cleanup brush nearby. Dip it in suitable polish remover and carefully tidy the skin around the nail without scrubbing the nail plate.
- Let patterns dry before top coat. If you rush, hearts and lines may streak.
- Choose colors with contrast. White on blush pink, black on nude or gold on cream show the design clearly.
For more beauty ideas, explore our beauty product guide. If you are researching nail care products too, our Onyx Professional nail cream article covers a related product.
Which Nail Art Designs Work Best on Short Nails?
Short nails are perfect for subtle details. A single dot, tiny heart, small white daisy or micro French-style tip leaves enough breathing room that the pattern is easy to see. A light pink or nude base can also make the nail shape look clean and defined.
On short square nails, try white French tips or glitter at the edge. On short rounded nails, tiny hearts and flowers often look especially soft. If your nails are very short, use a sticker instead of a large painted illustration, and keep the details close to one side rather than covering the whole nail.
Easy Nail Art Ideas by Occasion
For everyday wear: White French tips, sage leaf accents and thin wavy lines are easy to pair with different outfits.
For spring and summer: Tiny daisies, lavender hearts and pastel colors add a fresh touch without needing elaborate patterns.
For date night or Valentine’s Day: Mini hearts, black-and-pink nails and a French manicure with one outlined heart feel playful.
For weddings or parties: Gold foil, glitter gradient tips and marble-style nail decals look more dressed up while staying practical for beginners.
A Quick Nail-Care Note
Nice nail art should not come at the cost of uncomfortable nails. Dermatologists at the American Academy of Dermatology advise moisturizing nails after polish removal and avoiding cutting or forcefully pushing back cuticles. If your nails are sore, irritated or showing signs of infection, skip the manicure until the problem is addressed.
Regular polish is a good starting point for these designs. Gel manicures require extra care with curing and removal. The AAD’s gel manicure advice explains precautions and why you should not pick gel polish off your nails.
Frequently Asked Questions
What is the easiest simple nail art design for beginners?
A single dot, a small nail sticker or a fine glitter accent is usually easiest. You only need to work on one detail rather than painting a pattern across the entire nail.
Can I make nail art without professional tools?
Yes. A clean bobby pin or toothpick can make dots and simple petals. Tape or ready-made nail guides can help with straight French tips. Use purpose-made nail stickers for more detailed patterns.
What nail designs look good on short natural nails?
Try tiny flowers, micro hearts, thin French tips, a single wavy line or a glitter accent. Keep the pattern small so it does not overwhelm the nail.
How do I keep my nail art from smudging?
Let your base color dry before adding small details. Then allow the design to dry properly before applying a top coat. Use light brush strokes rather than pressing hard into the decoration.
Do I need gel polish for simple nail art?
No. Regular nail polish works for every idea in this guide, including tips, dots, hearts and sticker-based designs. Follow each product’s directions and avoid using gel products without the correct equipment and safety precautions.
Final Thoughts
The nicest simple nail art designs are the ones you will enjoy wearing. Start with a nude base and one accent, then experiment with colors when you feel more confident. You can make a manicure look thoughtful with just a tiny flower, a clean curved line or a small flash of gold.
Save your favorite idea for your next at-home manicure, and use the photo beside each design as a visual guide.


Disclosure: This post contains affiliate links. If you make a purchase through these links, I may earn a small commission at no extra cost to you.